1. Getting started with Java development and the Eclipse IDE
In this tutorial you learn how to get started with the Eclipse IDE to start programming in Java.
You learn how to create a Java project and your first Java class and how to start your program.
It assumes that you already installed and started the Eclipse IDE. It uses the dark theme from .
2. Create your first Java program
The following section describes how to create a minimal Java application using the Eclipse IDE.
2.1. Create project
Click on the Create a Java project quicklink.
Select from the menu.
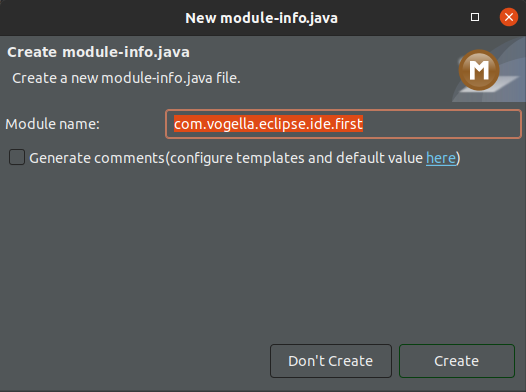
Enter com.vogella.eclipse.ide.first as the project name and press the Finish button to create the project.
Select Create if you are asked to create a module file.
A new project is created and displayed as a folder.
Open the com.vogella.eclipse.ide.first folder and explore the content of this folder.
|
In this tutorial the project is typically named the same as the top-level Java package in the project. This makes is easier to find a project related to a piece of code if you use multiple projects. |
2.2. Create package
|
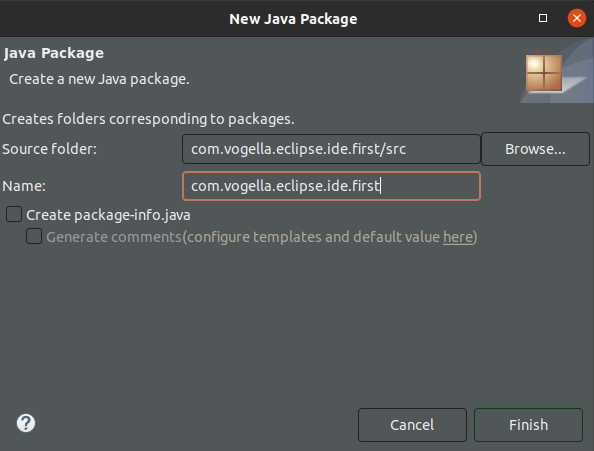
A good naming convention is to use the same name for the top-level package and the project.
For example, if you name your project |
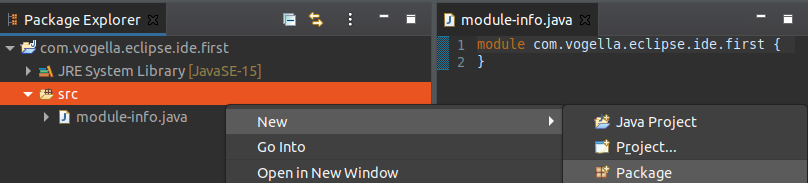
Create the com.vogella.eclipse.ide.first package by selecting the src folder, right-click on it and select .
Press the Finish button.
2.3. Create Java class
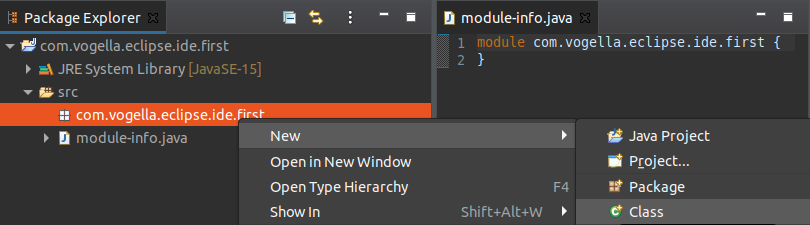
Right-click on your package and select to create a Java class.
Enter FirstJava as the class name and select the public static void main (String[] args) checkbox.
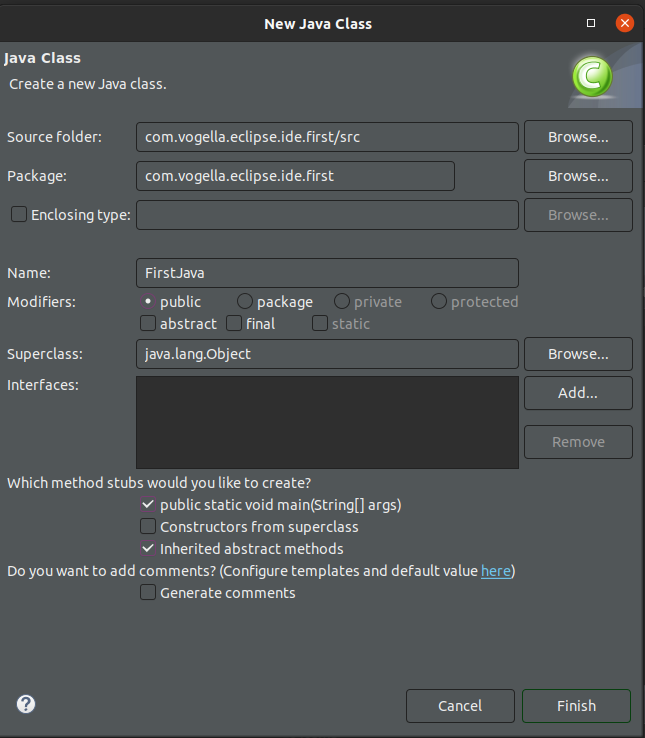
Press the Finish button.
This creates a new file and opens the Java editor. Change the class based on the following listing.
package com.vogella.eclipse.ide.first;

public class FirstJava {

    public static void main(String[] args) {
        System.out.println("Hello, World!");
    }
}|
You could directly create new packages via the new Java class dialog. If you enter a new package in this dialog, it is created automatically. |
2.4. Run your application code from the IDE
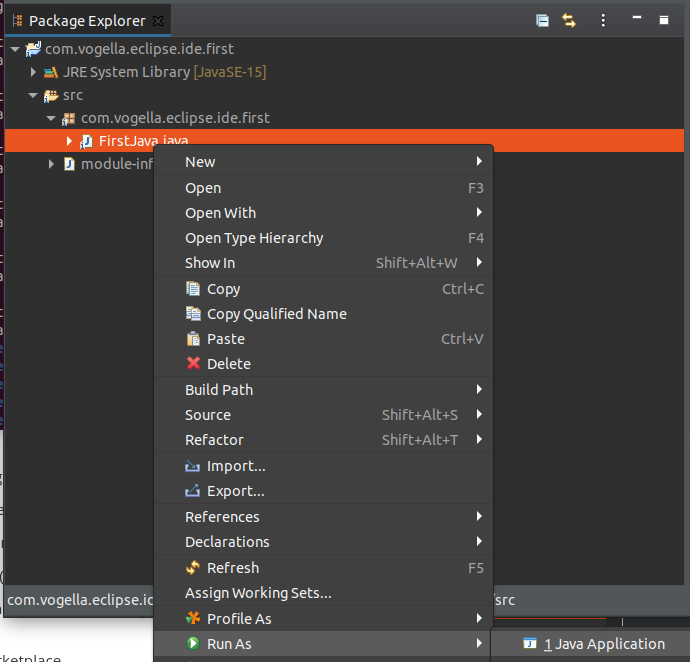
Now run your code. Right-click on your Java class in the Package Explorer or Project Explorer and select .
|
You can right-click in the editor and select . |
Eclipse will run your Java program. You should see the output in the Console view.
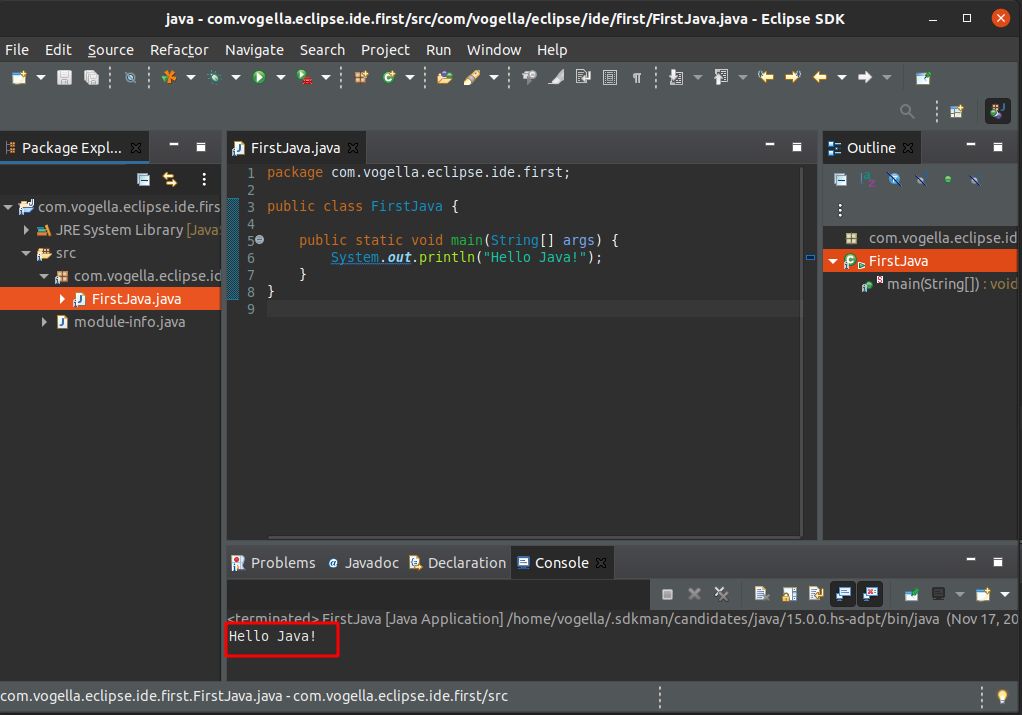
Congratulations! You created your first Java project, a package, a Java class and you ran this program inside Eclipse.
3. Eclipse Resources
3.1. vogella Java example code
If you need more assistance we offer Online Training and Onsite training as well as consulting