Eclipse WindowBuilder. This tutorial describes the usage of WindowBuilder for creating user interfaces.
1. Using the SWT Designer for visual UI design
1.1. Overview of the SWT Designer
SWT Designer is a visual editor used to create graphical user interfaces. It is a two-way parser; for example, you can edit the source code or use a graphical editor to modify the user interface. SWT Designer synchronizes between the two representations.
SWT Designer is part of the WindowBuilder project. WindowBuilder provides the foundation and SWT Designer adds the support for working with SWT-based applications.
1.2. Using SWT Designer
SWT Designer provides a special editor. This editor can work with Eclipse 4 parts, SWT and JFace dialogs, JFace wizards, etc.
The following screenshot demonstrates what the editor looks like.
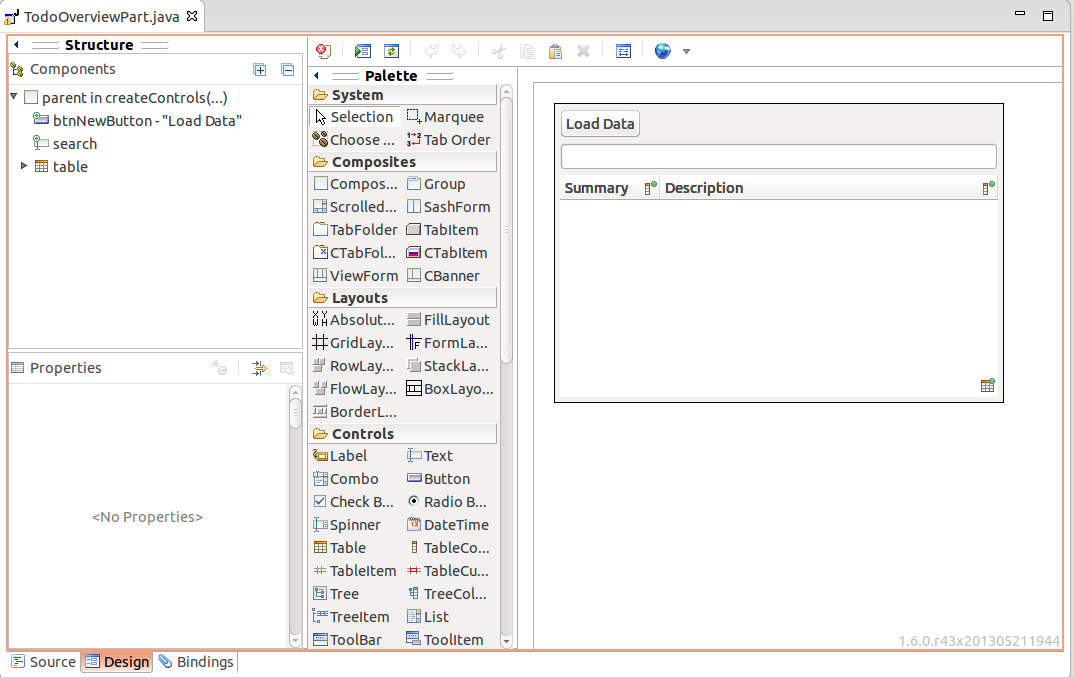
SWT Designer allows you to drag and drop SWT components into an existing layout. You can configure layout settings and create event handlers for your widgets.
SWT Designer contributes additional SWT and JFace templates to the Eclipse IDE.
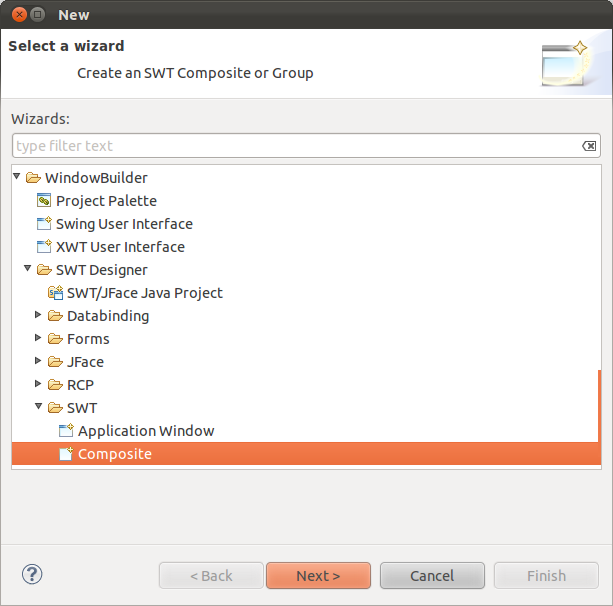
For example, you can use it to create Composites and add these to the Eclipse user interface.
To create a new Composite select .
SWT Designer supports establishing data binding via the JFace Data Binding framework.
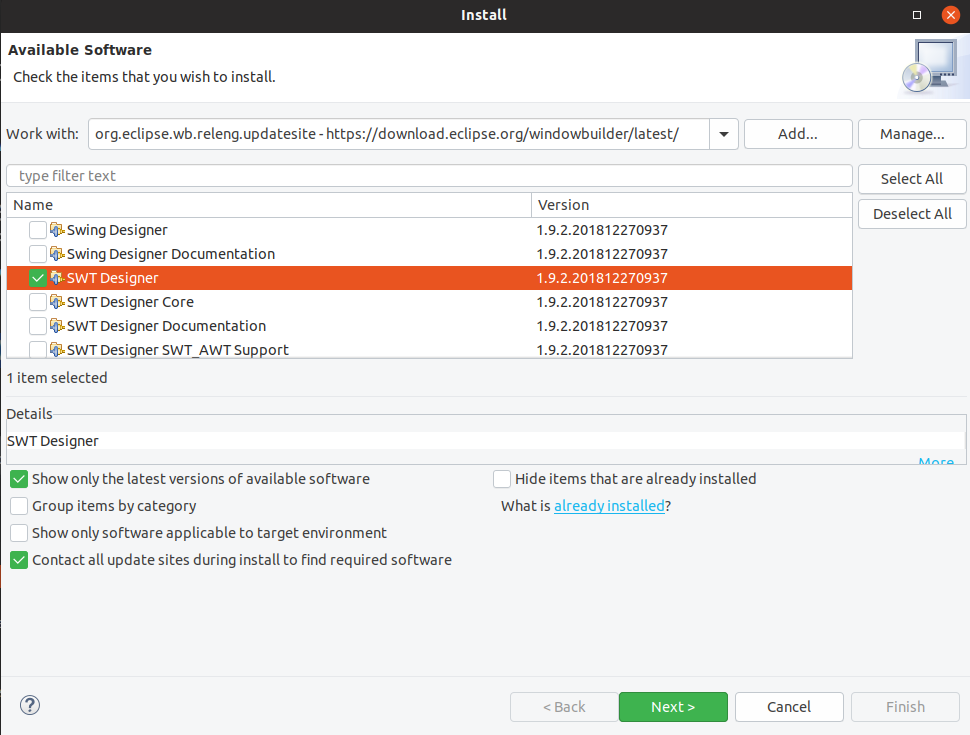
2. Install SWT Designer
To install SWT Designer use the menu entry and enter the following update site to use it. https://download.eclipse.org/windowbuilder/latest/
|
The WindowBuilder downloads page lists the available SWT designer releases. Typically, the latest release is the best to use. |
3. Optional exercise: Getting started with SWT Designer
| Most exercises in this book use the latest platform API, which SWT Designer does not yet support. Therefore, it is recommended not to use SWT Designer for the rest of the exercises after you finish this one. |
3.1. Building a user interface
Add a new part to your application.
The implementation class of this view should be WindowBuilderPlaygroundPart.
|
The following exercise assumes that you have SWT Designer already installed. |
Right-click on your WindowBuilderPlaygroundPart class and select .
|
WindowBuilder uses the |
package com.vogella.tasks.ui.parts;
import jakarta.annotation.PostConstruct;
import org.eclipse.swt.widgets.Composite;
public class WindowBuilderPlaygroundPart {
// the WindowBuilder / SWTDesigner tooling
// uses the @PostConstruct method to figure out
// that the class is an Eclipse 4 part
// one method must be annotated with @PostConstruct and
// must receive at least an SWT Composite
@PostConstruct
public void createControls(Composite parent) {
System.out.println(this.getClass().getSimpleName()
+ " @PostConstruct method called.");
}
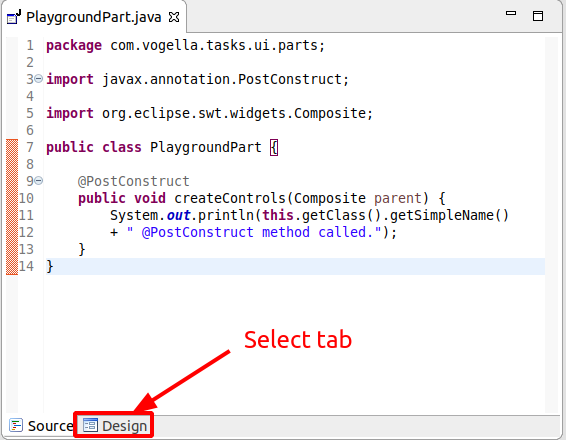
}Switch to the Design tab in the WindowBuilder editor. This selection is highlighted in the following screenshot.
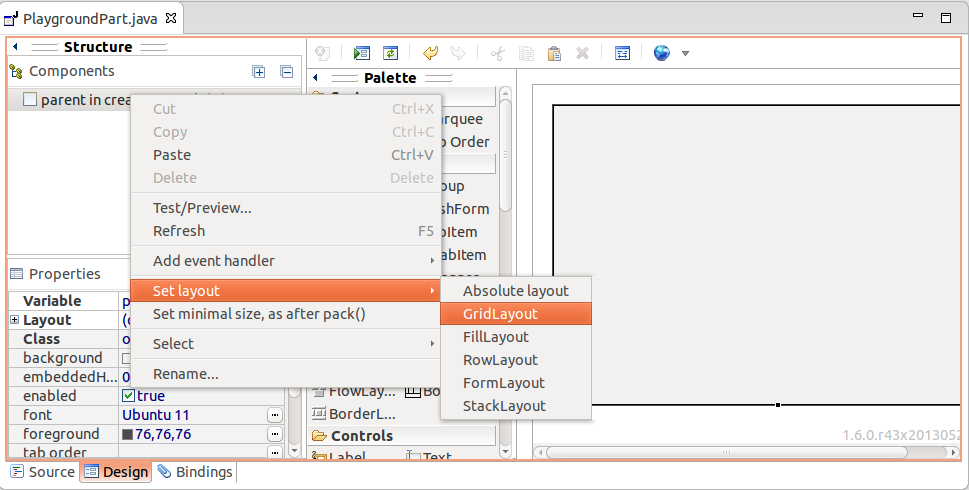
Use the SWT Designer to change the layout of the Composite of the part to a GridLayout.
Click in the Palette on Button and add a few buttons to your user interface.
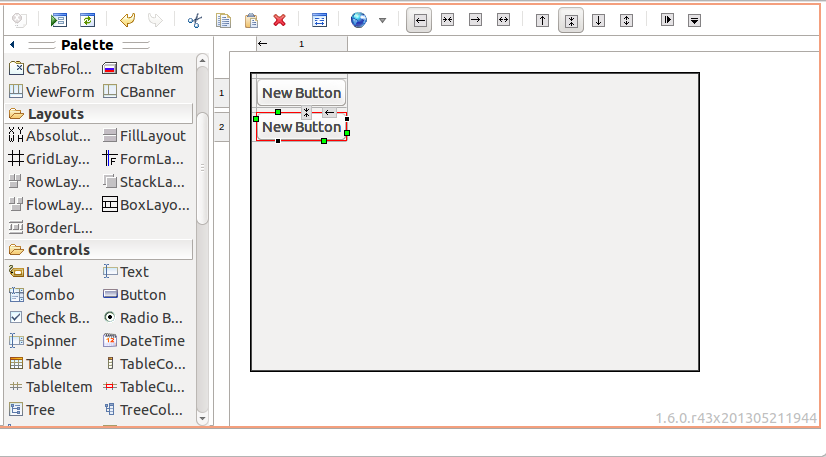
Add a Label and a Text field.

3.2. Add a SelectionListener to the button
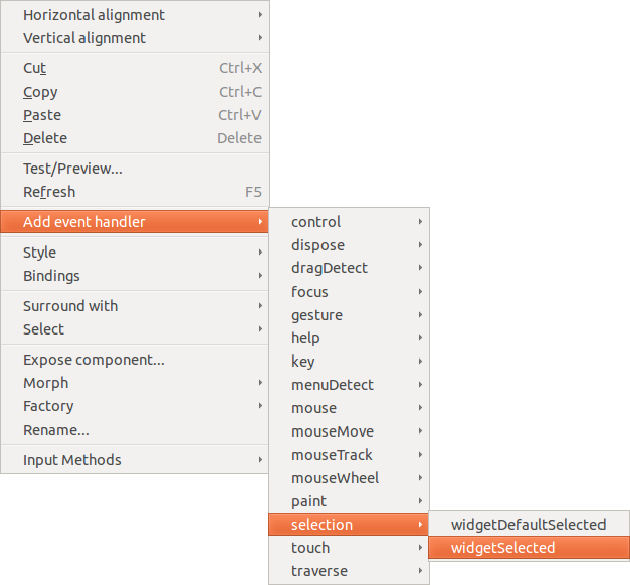
Assign a SelectionListener (event handler) to one of your buttons for the widgetSelected.
You can do this via a right-click on the button.
Select .
3.3. Review the generated code
Switch to the Source tab and review the code generated by the SWT Designer.
4. Learn more and get support
This tutorial continues on Eclipse RCP online training or Eclipse IDE extensions with lots of video material, additional exercises and much more content.
5. Links and literature
Nothing listed.
5.1. vogella Java example code
If you need more assistance we offer Online Training and Onsite training as well as consulting