This article describes how to use the Git version control system with Visual Studio Code.
1. Using Git with Visual Studio Code
This tutorial explains how use Visual Studio Code to:
-
create Git repositories
-
stage changes
-
commit changes
2. Performing a local Git workflow via Visual Studio code
In this exercise, you use Visual Studio Code (Code) to create a local Git repository and add content to it.
2.1. Create and select a directory for hosting your Git repository
Create a new directory, for example codegit for this exercise. Open this directory in Code via
If code ask you, answer yes that you trust the authors.

2.2. Create a new Git repository
Switch to the Source Control tab and select Initialize Repository.
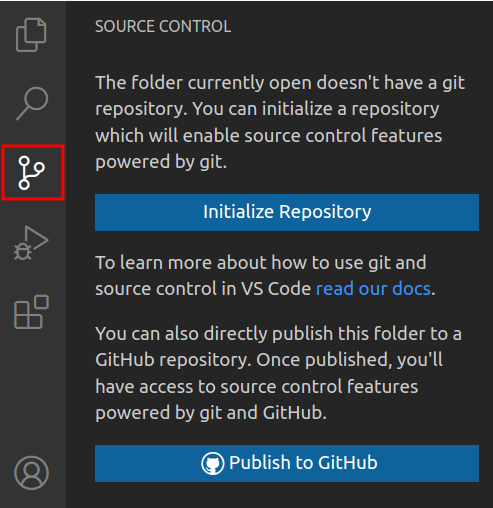
Alternatively, open the menu and then select Git: Initialize Repository.
This creates a new local Git repository in the current folder.
2.3. Create some files
Create the following files and directory structure in the current folder.
-
datafiles/data.txt
-
Readme.adoc
-
Questions.adoc
-
Answers.adoc
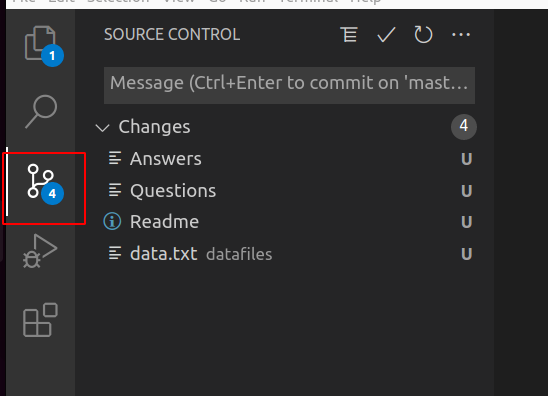
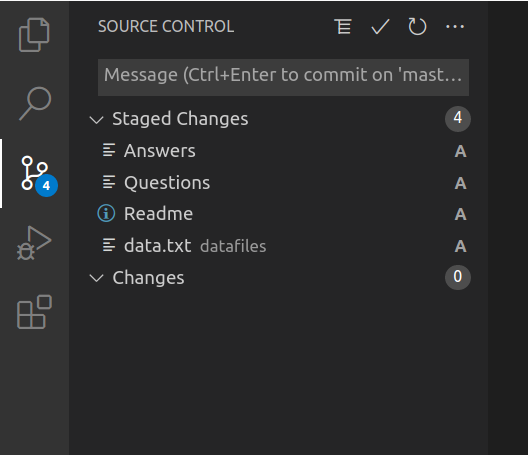
2.4. See the current status of your repository
View the status of your repository by clicking on the Source Control button.
This looks similar to the following screenshot.
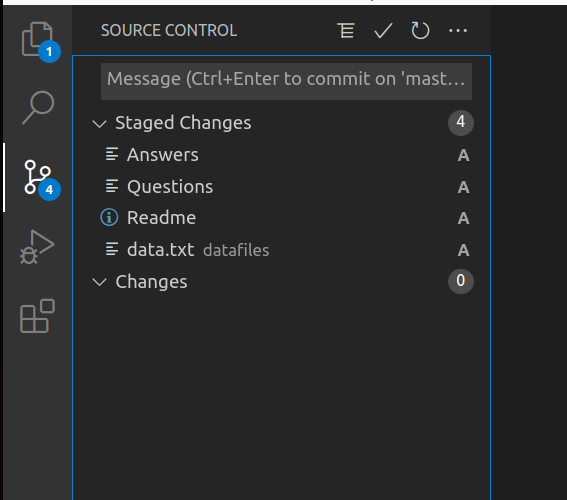
2.5. Add changes to the staging area
Stage all changes, e.g., your new files for the next commit by clicking on the first icon.

Afterwards, you status of all files is changed.
2.6. Change files that are staged
Change the Readme.adoc file, by adding some text to the file.
| Files cannot be changed in the Source Control tab. Switch back to the Explorer |
Validate that the new changes are not yet staged.
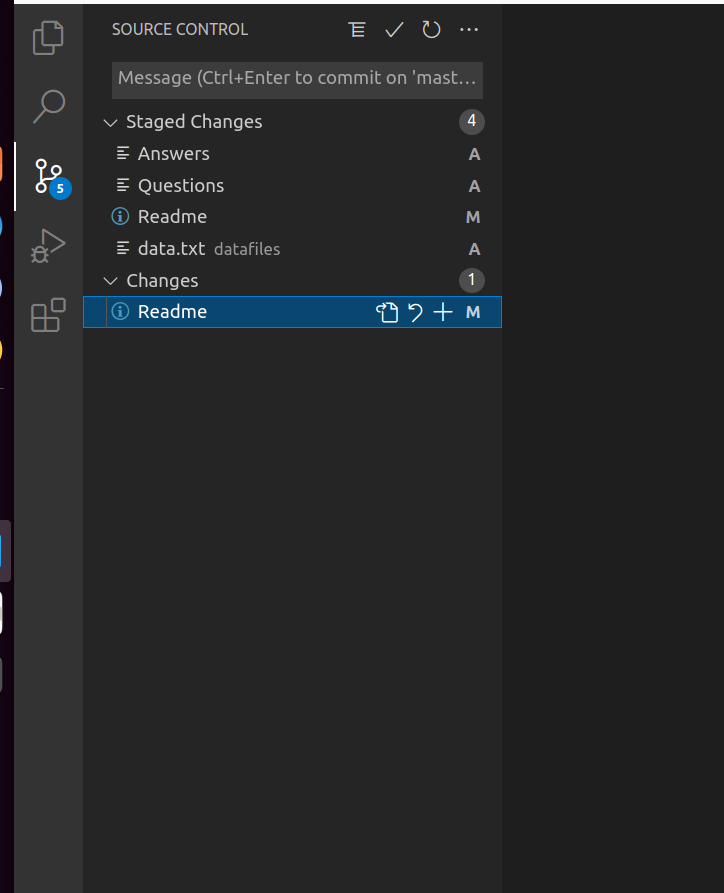
Add the new changes to the staging area.
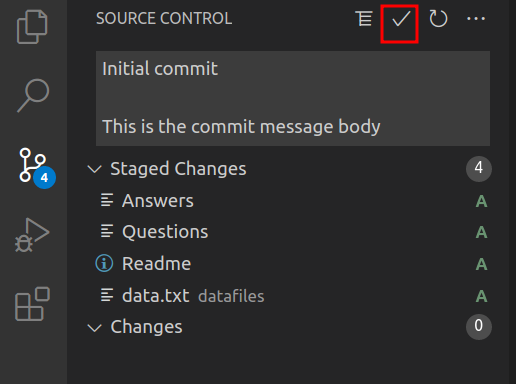
2.7. Commit staged changes to the repository
Add a commit message and commit the staged changes to your Git repository by pressing the Commit button
2.8. Viewing the commit history
Visual Studio code allows to see changes via the Explorer Timeline view.
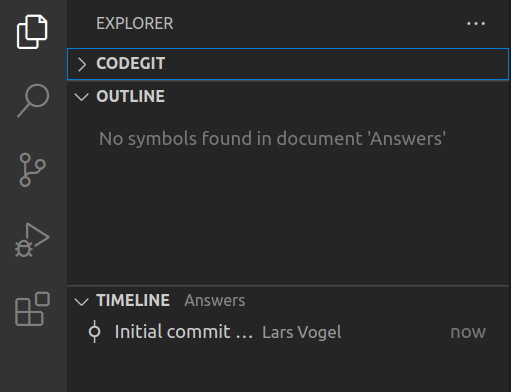
Hover over the commit to see the commit message.
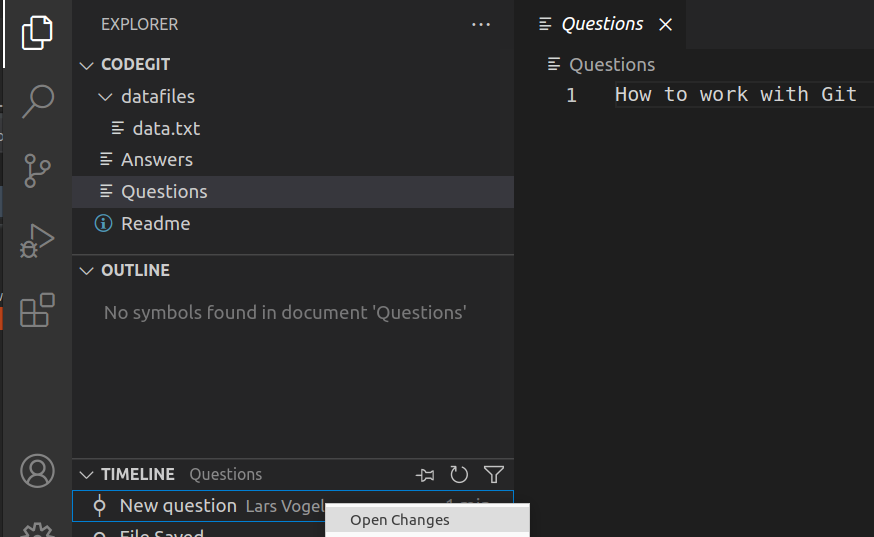
2.9. Viewing the changes of a commit
Select a commit in Timeline and select Compare via right-click.

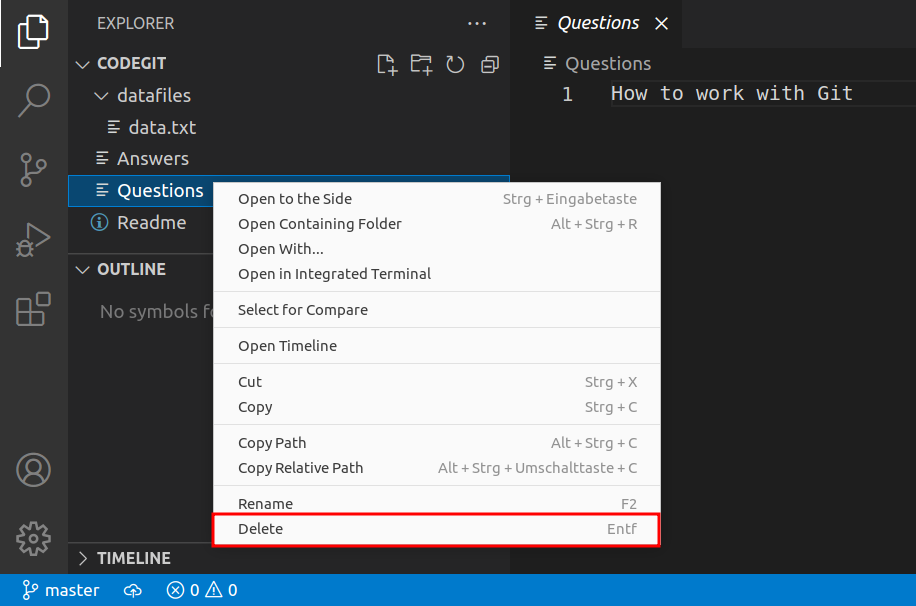
2.10. Remove files
Delete the Questions.adoc file via the context menu by right-click on the file and selecting Delete.
Stage deletion and commit it to your repository with the same actions you used before to stage and commit.
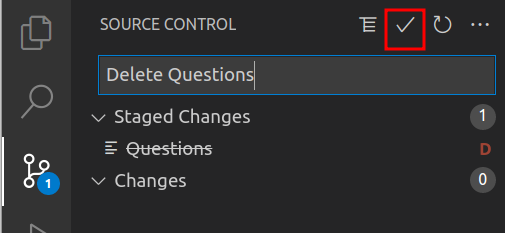
Your file is removed.
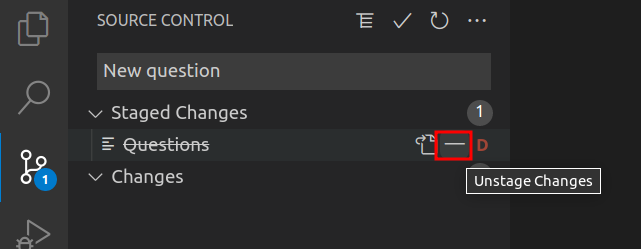
2.11. Revert changes in files in the working tree
You want to undo the last commit, select menu and then select Git: Undo Last Commit.
Unstage the change.
Now undo the changes (the deletion).

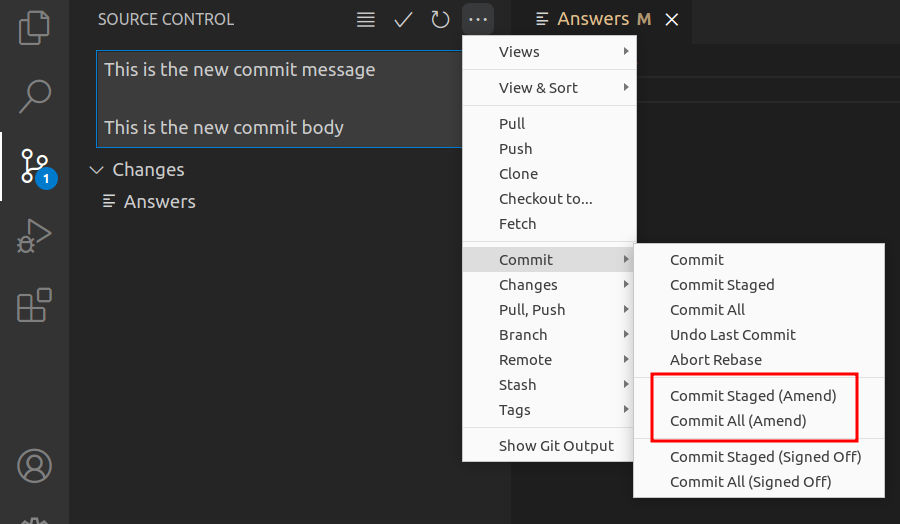
2.12. Correct the changes of the commit with git amend
Assume the last commit message was incorrect as it contained a typo.
Adjust the last commit message via git commit --amend.
You do this in code via the menu, select `Commit All (Ammend) `.
2.13. Ignore files and directories with the .gitignore file
Create the following .gitignore file in the root of your directory.
*.class
.metadata/*
doNotTrackFile.txt
2.14. Commit the .gitignore file
It is a good practice to commit the .gitignore file into the Git repository.
Stage and commit the file to your Git repository.
3. Working with branches in VS code
In this exercise, you learn how to work with local branches to develop independent features using the Eclipse IDE.
|
The examples in this exercise are using the programming language Java and the Maven build system. For the exercise it is not important that you perform the programming correctly. If you are not a Java developer or do not have the Maven tooling available in your IDE, simply change some comments or formatting in the exercises. The purpose of these exercises is that you learn how to use the Git Tooling not the programming language Java. |
3.1. Clone the example repository
Select . This opens a text box to clone a Git repository. Enter the following URI in the URI field:

Press enter and select a repository location on your computer.
| Never clone to a mounted network device, as this would slow down access to your Git repository. |
Code asks if you want to open the repository. Select Open.
3.2. Import project
Code will tell you that projects have been imported into workspace. Select View projects.
Otherwise, you can also select and select the directory to which you clone the repository.
3.3. Check Git status
Code may adjust the project metadata during import, check the Source Code tab. Either commit or undo these adjustments. If in doubt, commit them.
3.4. Start application
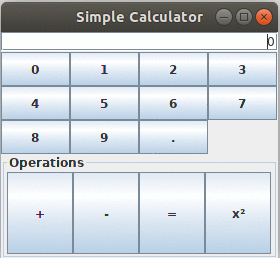
If your installation supports Java and Maven, you can start the application.
To run the application, select the org.eclipse.example.calc.internal.ui.swing.CalculatorUI file and select menu:[Run Java].
4. Develop a divide feature
4.1. Create a local branch named addDivideOperation
Switch to the Source Control tab and select .
Enter addDivideOperation and origin/master as ref.
This creates the new branch and switches to it.
4.2. Implement the divide operation
|
It is not necessary to correctly implement the divide operation to learn the usage of Git. Feel free to do other changes, e.g., a change in a code comment. |
Start editing the source code and implement the divide operation.
For this, create a new class called Divide.java in the org.eclipse.example.calc.internal.operations package similar to the following.
package org.eclipse.example.calc.internal.operations;

import org.eclipse.example.calc.BinaryOperation;

public class Divide extends AbstractOperation implements BinaryOperation {

        @Override
        public String getName() {
            return "/";
        }

        @Override
        public float perform(float arg1, float arg2) {
            return arg1 / arg2;
        }
}
Register the new operation in the org.eclipse.example.calc.internal.Calculator class via the setupDefaultOperations method.
// new import
import org.eclipse.example.calc.internal.operations.Divide;
// more code

    private void setupDefaultOperations() {
        new Equals();
        new Minus();
        new Plus();
        new Square();
        new Divide();
    }
4.3. Test the divide operation
Run the unit tests, to ensure that you did not break existing functionality. Optional, implement new unit tests for this operation and run them also.
4.4. Commit your changes
Use the Source Control tab.
-
Stage all files that you want to commit
-
Use a short and descriptive commit header, e.g., "Implements Divide operation"
-
Enter a commit message explaining why the change was done, e.g., "Divide was requested by Product Management, this change implements the function and registers it as operations in the Calculator".
Select the commit button.
This saves the state of your files into the Git repository.
5. Develop a power feature
You have been ask to develop also a power feature. This change should be done independent from other changes in its own branch.
5.1. Create a local branch name addPowerOperation
Switch to the Source Control tab and select .
Enter addPowerOperation and origin/master as ref.
This creates and switches to your new branch thats points to the same commit as the remote tracking branch refs/remotes/origin/master points to.
5.2. Develop the power feature
Develop a Power class similar to the Plus class in the package org.eclipse.example.calc.internal.operations.
This should be done in the org.eclipse.example.calc project.
package org.eclipse.example.calc.internal.operations;
import org.eclipse.example.calc.BinaryOperation;
public class Power extends AbstractOperation implements BinaryOperation{
@Override
public String getName() {
return "^";
}
@Override
public float perform(float arg1, float arg2) {
return(float) Math.pow(arg1, arg2);
}
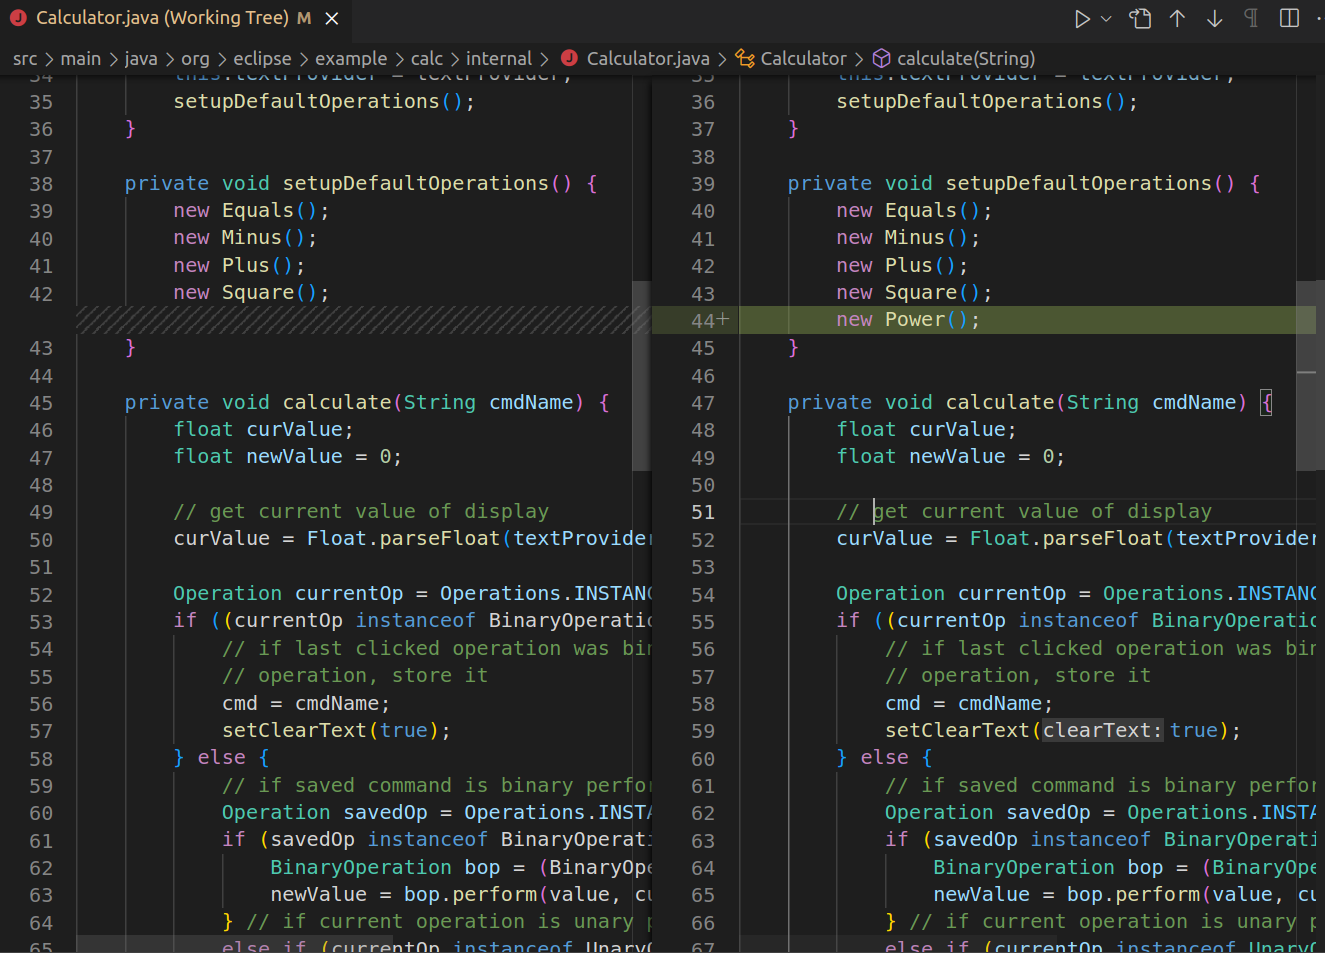
}Register the new operation in the org.eclipse.example.calc.internal.Calculator class via the setupDefaultOperations method.
// new import
import org.eclipse.example.calc.internal.operations.Power;

// more code

    private void setupDefaultOperations() {
        new Equals();
        new Minus();
        new Plus();
        new Square();
        new Power();
    }
5.3. Do an undesired modification
Assume you want to prepare a change which should not (yet) be part of the next commit.
To simulate such a change, create a new text file called ToBeDeleted.txt.
5.4. Review your changes
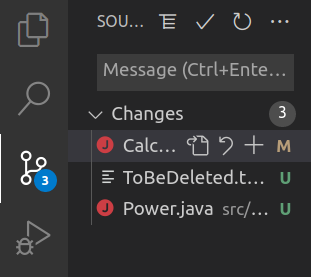
Review you changes in the Source Control tab.
You see three unstaged changes.
-
ToBeDeleted.txt -
Calculator.java -
Power.java
Double-click on Calculator.java to inspect which changes you have done.
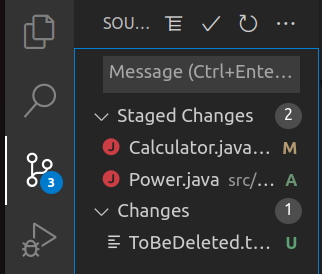
Stage Calculator.java and Power.java.
This marks them to be included in the next commit.
5.5. Commit your change
Commit now your changes using a description commit message.
5.6. Cleanup
After inspecting your recent change, you decide that the file ToBeDeleted.txt should be deleted.
Revert your change by selecting the ToBeDeleted.txt file in the Source Control tab.
Select the Discard changes entry and confirm the resulting dialog.
6. Develop a multiply feature
You also have been ask to develop also a multiple feature. This change should be done independent from other changes in its own branch.
6.1. Create a local branch name addMultiplyOperation
Create a new local branch called addMultiplyOperation based on the ref branch origin/master.
Ensure that you do not see the changes of the first exercise anymore in your workspace.
6.2. Implement the multiply operation
Add a Multiply operation, do not commit yet, first read on.
package org.eclipse.example.calc.internal.operations;

import org.eclipse.example.calc.BinaryOperation;

public class Multiply extends AbstractOperation implements BinaryOperation {

        @Override
        public String getName() {
            return "*";
        }

        @Override
        public float perform(float arg1, float arg2) {
            return arg1 * arg2;
        }

}
Register the new operation in the org.eclipse.example.calc.internal.Calculator class via the setupDefaultOperations method.
private void setupDefaultOperations() {
new Equals();
new Minus();
new Plus();
new Square();
new Multiply();
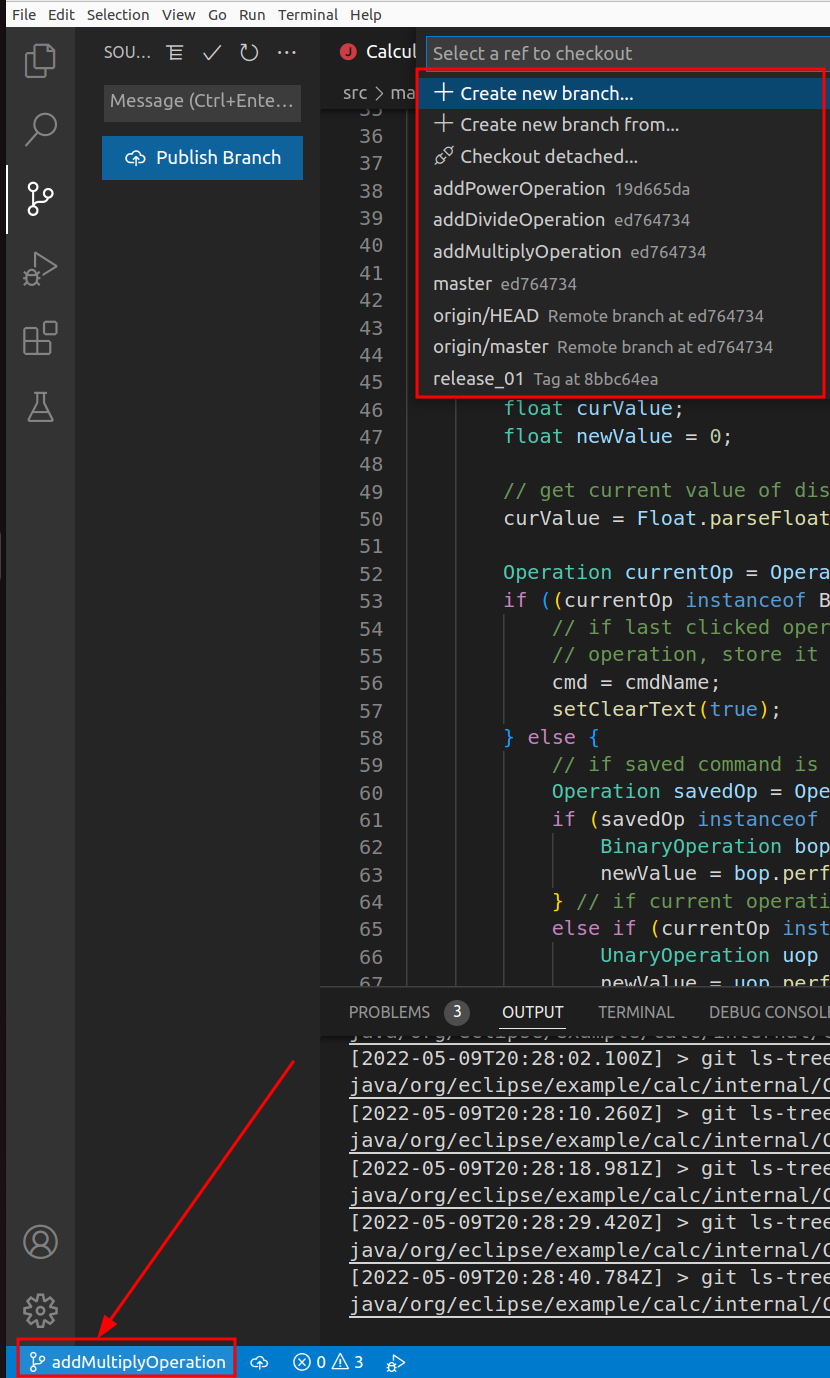
}6.3. Switch branches
Now you want to switch to another branch but you want to continue working on your new feature later on. The easiest thing to do is to just commit your work in progress and change that commit later on. Use the Source Control tab to enter a preliminary message, e.g., "[Unfinished] Add multiply operation", stage all changes and click the Commit button.
Now you can switch to the addDivideOperation feature branch.
This can be done by double-clicking on the branch node in the footer of Code
Check that your workspace contains the changes you committed in your first feature (implementing divide) branch.
You could now continue working here.
For example, you may want to fix the division by zero issue if it is not already handled.
If you do any changes in the addDivideOperation branch do not forget to commit them with amend before the next step
6.4. Continue working on the addMultiplyOperation branch
Switch back to the addMultiplyOperation branch
Do another change in the workspace improving the multiply functionality.
6.5. Fixing the commit message
The amend feature is often used to fix the commit message of what you just committed.
Now, change the commit message to something meaningful (e.g remove [UNFINISHED]). Afterwards, select from the view menu.
7. Summary
You developed three distinct features in parallel starting from the same parent commit. Alternatively, you could also have developed them one after another with the next commit based on the previous development.
The approach to develop in parallel has multiple advantages:
-
You can start developing other features / bug fixes while waiting on other people or actions
-
If you find an issue in one of the changes the other changes are not affected. In the next exercise you will learn, how you can combine them, with the merge, rebase or cherry-pick operation.
8. Merge branches and resolve merge conflicts via Visual Studio code.
In this exercise, you learn how to perform the merge operation to combine the work done in different branches. You learn also to resolve merge conflicts which can occur during that process. Merge conflicts occurs if the same lines in the same file are modified in different branches.
The following assumes that you have three branches with the same ancestor commit:
-
addDivideOperation
-
addPowerOperation
-
addMultiplyOperation
Each branch contains a commit which modified at least one file at the same position.
8.1. Check out the master branch
All features should be merged into master.
Now you would like to have both new features in the master branch. One possibility to achieve that is to merge the branches into the master branch, one after the other. Later In this exercise, you will use the other option, the rebase operation.
Ensure that you have checked out the master branch where you want to have the merged state, i.e. where the merge commit will be created.
8.2. Trigger the first merge
In the Source Control tab, select from in the view menu.
Select addDivideOperation.
This merges the content referred to by addDivideOperation branch into the content referred to by the master branch.
Since there was no work done on the master branch and addDivideOperation points to a successor commit of the commit in
master Git simply performs a fast forward merge and advances the master branch to the same commit as the addDivideOperation branch.
8.3. Trigger the second merge
In the Source Control View, select from in the view menu.
Select addPowerOperation.
In the History View, select Merge in the context menu of the branch that contains the conflicting commit.
This merges the content of this branch into the master branch.
This time the merge operation should end with conflicts.
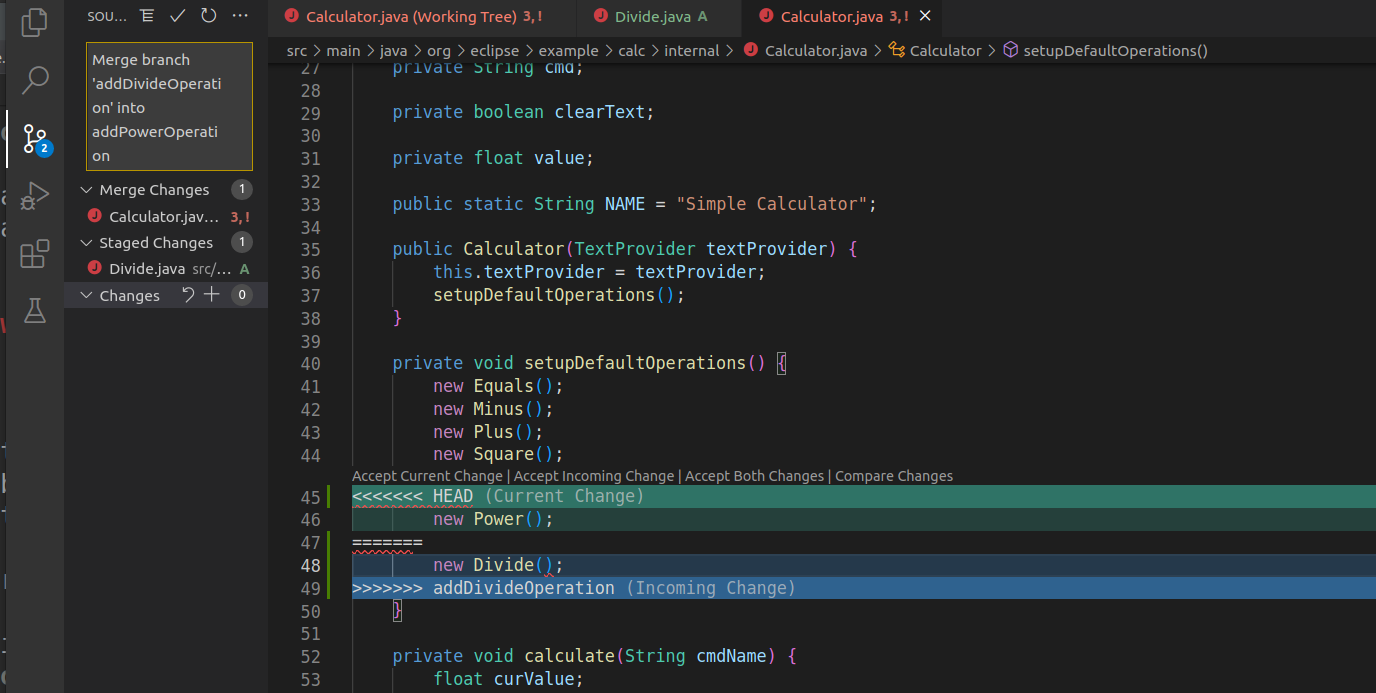
8.4. Resolving merge conflicts
If a merge generates conflicts the repository is in a special state. The conflicts have to be resolved before normal work can go on.
If you open the conflicting file in Vs Code. Stage and commit to finish the merge operation.
8.5. Trigger the third merge
In the Source Control View, select from in the view menu.
Select addPowerOperation.
Resolve any conflict
8.6. Reset your master to the situation before the merge
Git has this awesome feature that you can undo changes via the reset operation. This allows you in this example to undo the merge and do it again or select another operation like rebase. Unfortunately, the default tooling of Vs Code does not support the reset command.
Use another tool, e.g., the command line to reset the master branch, e.g., git reset --hard origin/master.
Check that the situation is the same as before you started merging, you can now perform the merge operation again, or use this situation for the rebase operation.
9. Using GitLens to have better Git tooling in VsCode
9.1. Git history
The GitLens extension is a popular extension for Vs Code.
Select the extension tab and search for GitLens. Install the extension.
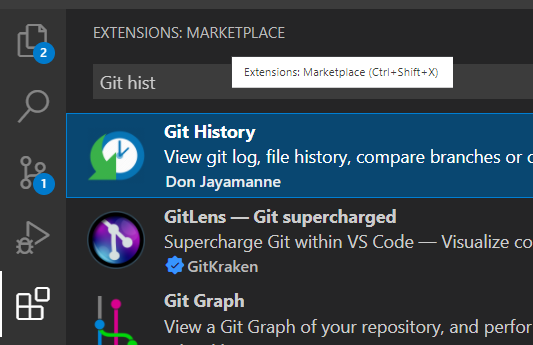
Use View→ Commmand Palette → Git:View History to open a view to show the history. This view allows you also to perform Git operations like reset.
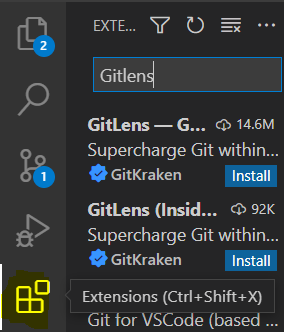
9.2. Gitlens
The GitLens extension is a popular extension for Vs Code.
Select the extension tab and search for GitLens. Install the extension.
10. More links for Git
10.1. vogella Java example code
If you need more assistance we offer Online Training and Onsite training as well as consulting